Craft & TipsEasy
How to Make Foam Props Guide (With Prop Patterns included)
• Cosplay Foam Props Guide Create high-quality foam props with this beginner-friendly guide, complete with included templates. Covers cutting, shaping, and assembling foam pieces to build durable, detailed props with a clean, professional finish
Steps
Materials & Tools
Foam Types • EVA foam (most common; comes in sheets of different thoughts) • Foam mats (cheap alternative, like gym mats) Tools • Sharp utility knife / craft knife • Heat gun • Contact (best glue) or hot glue • Sandpaper / rotary tool (like a Dremel) • Ruler & Marker • Sealing materials (like Mod Podge, Plasti Dip, or wood glue) • Paints (acrylic preferred)Plan your Prop
• Find or draw a reference image. • Break the prop into simple shapes (layers). • Scale decision (life-size, mini, etc.). Tip: Print templates or sketch on paper first. You'll find prop patterns/templates at the end of this guide that will help you with this stepCut the Foam
• Transfer template to foam using a marker. • Cut slowly with a sharpened edge • Often dull blades tear foam. Tip: For angled edges, tilt your knife while cutting.Shape the Foam
• Use a heat gun to: • Curve foam • Seal the surface lightly • Gently bend while warm to create shapes. Tip: Do not overheat or it can burn or warp.Put the Prop Together
• Use contact cement for strong bonds: • Apply to both surfaces • Wait ~5–10 minutes • Press together firmly • Use hot glue for quick fixed (less durable)Add Details
• Carve lines or patterns with a blade or rotary tool. • Layer foam pieces for details. • Use a heat gun lightly to open cuts for depth.Seal the Foam
Foam is porous, so sealing is crucial. Options: • Mod Podge (easy, beginner-friendly) • Wood glue (cheap, actual) • Plasti Dip (best smooth finish, spray-on) Apply multiple thin coats.Paint
• Use acrylic paints. • Start with a base coat. • Add shade, dry brushing, and weathering for realization. Tip: Metallic paints + black wash = instant realized.Prop Patterns
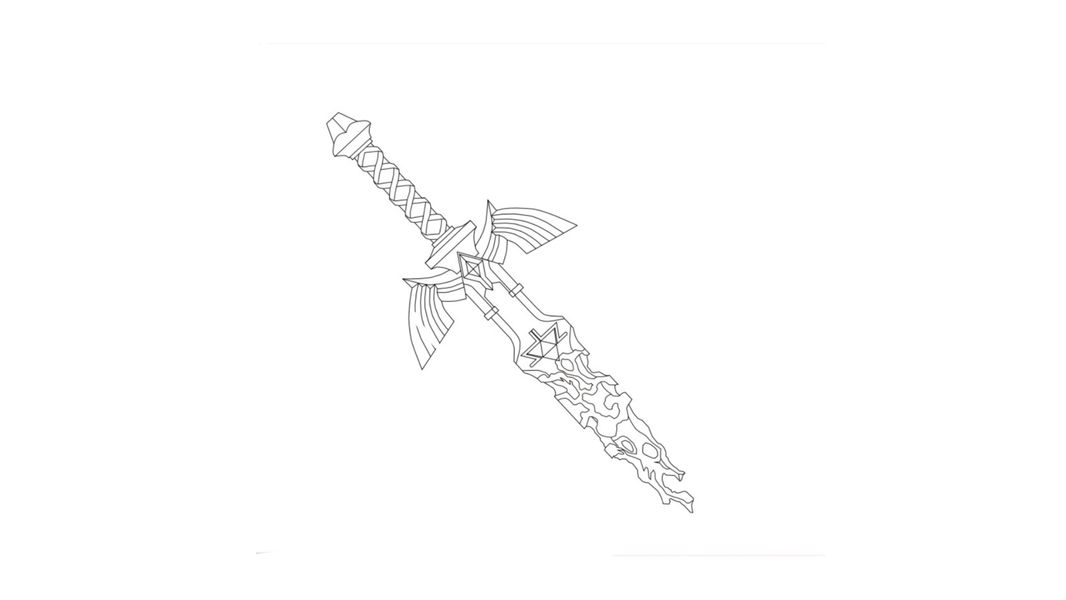
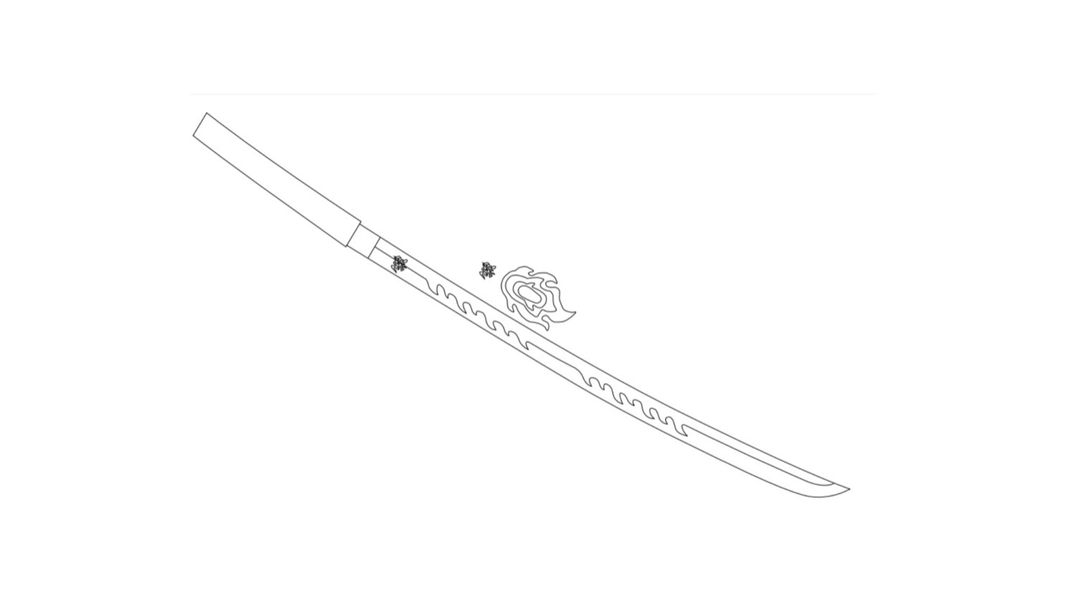
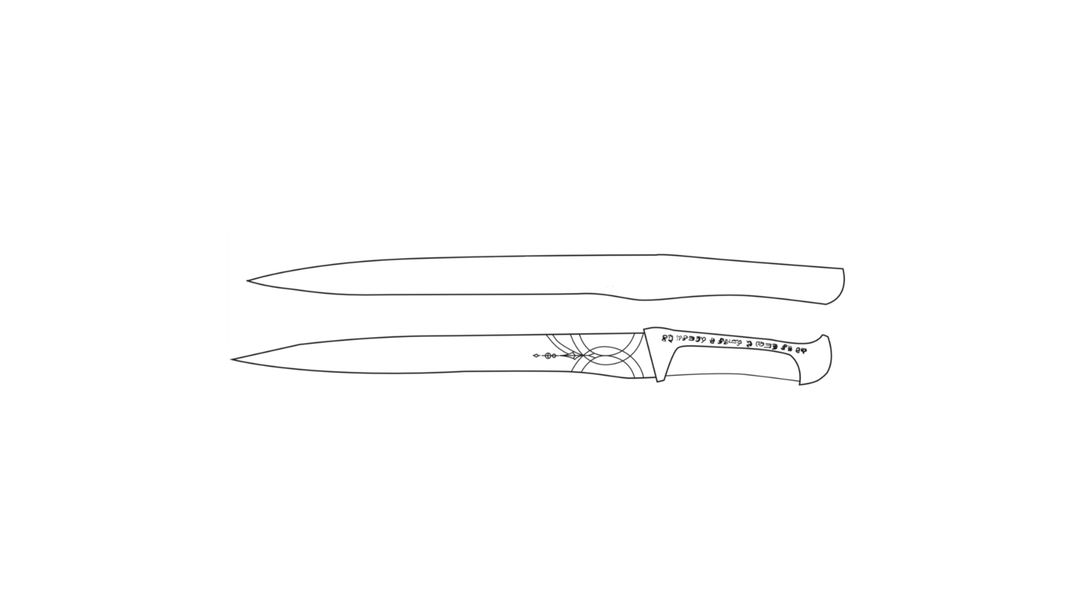
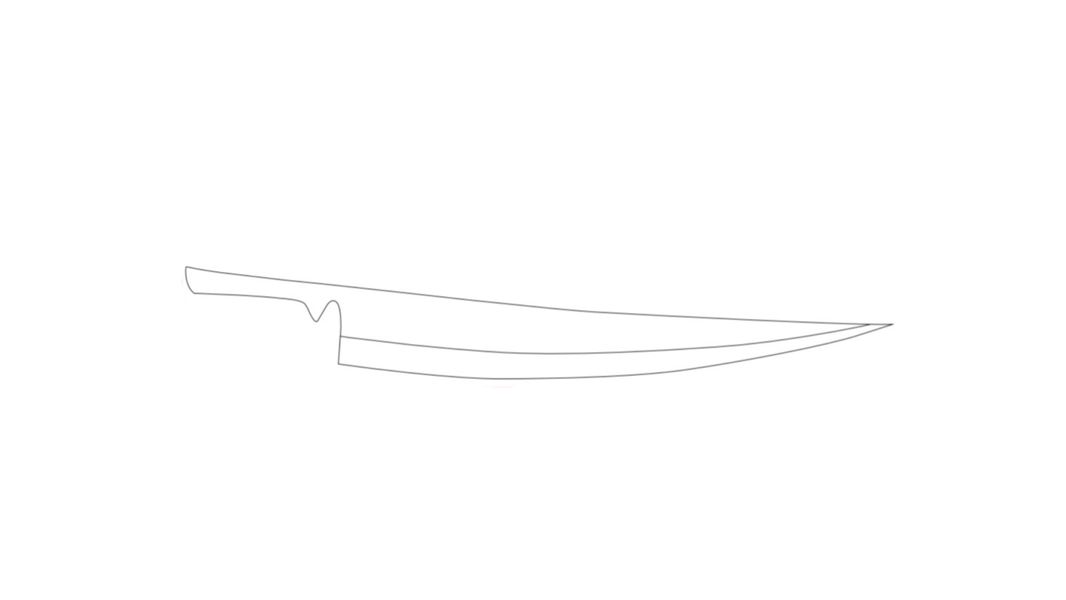
Props: Decayed Master Sword from The Legend of Zelda: Tears of the Kingdom, Tanjiro Kamado's Nichirin Blade from Demon Slayer: Kimetsu no Yaiba, Crysknife from DuneProp Patterns 2#
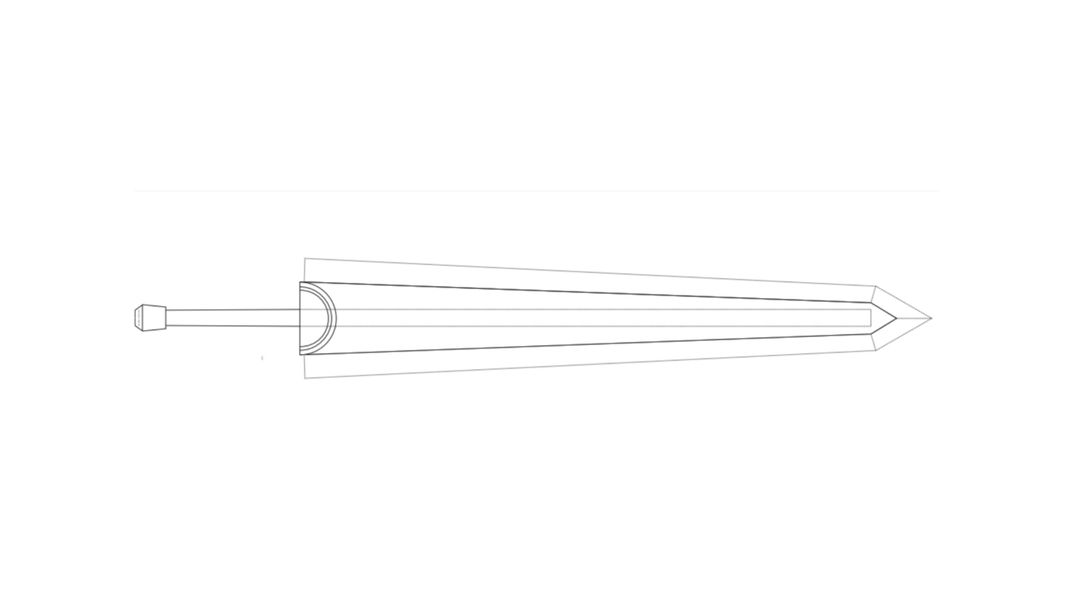
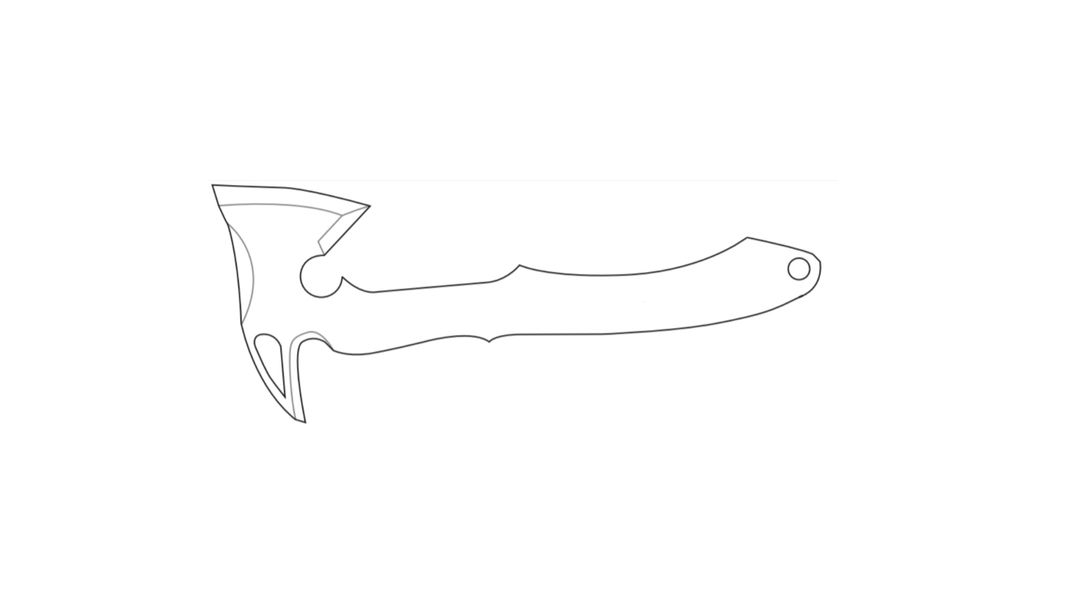
Props: Guts' Dragon Slayer Sword from Beserk, Ichigo Kurosaki's Sword from Bleach, Leon Kennedy's Hatchet Axe from Resident Evil Requiem