Make a wig with buns
You want to do a wig with husks, like Toga, Miku, Nobara (endig vers.), but without ponytail? You're in the right place. I'll explain to you at best how I made mine!
What you need
- *Wig long1
- *Waffle iron1
- *Polystyrene balls2
- *Bottle caps2
- *Bottle necks2
- *UHU glue 3 in 11
- *Green Syoss lacquer1
- *Glue gun1
- *Comb1
- *Wattine1
- *Quickly1
- *Or glue repair gel1
- *Hair dryer1
- *Birds1
Steps
First step
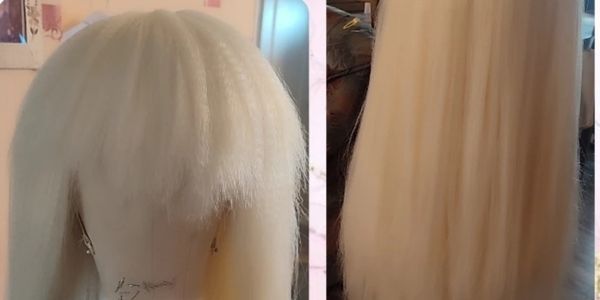
First of all, you come to hang your wig on your head support. Then you come brush your wig properly, to remove all the knots that might have formed. And now you tackle a very long job, the total embossing of the wig! To do this, you have a waffle iron and a comb. So you will waffle small wicks in small sections by sections (I mean the hair lines that have seen it), from top to bottom and vertical. Then you brush the wick from bottom to top. You do this on the whole wig, to have maximum volume, it is very importantSecond stage
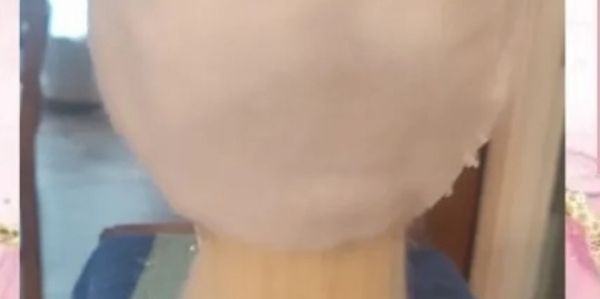
Now you will prepare the base of the wig, to allow to realize the attached hair effect. To do this, you will work out (with a quick sew or any object that allows you to slice and cut the threads) each row of hair, so that there is nothing left (unless you have a fringe, leave these rows of hair). Then you'll get a wattine and a glue gun, and put it on the entire wig. You don't need a thin layer to the point where you see it through, but not an overly thick layer that makes like a helmetThird stage 1
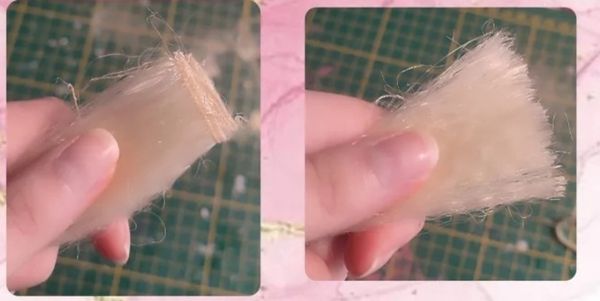
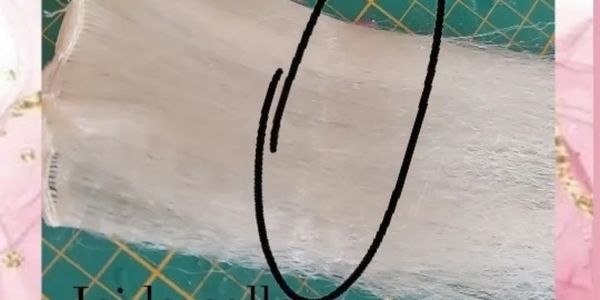
Now, you're going to do the wig line, to do this, with a pen, you're going to draw the line of the line. That done, you come to cut a cut (not too deep) along this line. You also come to trace where the chignons will be, tracing the contour of the bottle cap. Now, to make this line, you will have a line of wick, from which you will cut the end (as on the image). The wick taken must not be too thin, but not too thick either! Next, you will put glue (either the gel repair or the UHU 3 in 1) a little over the tip of the hair and the condition up and down, from where the glue is towards the end. And on both sides, then let it dryThird stage 2
You repeat this process until you have enough for the whole line in 2 times. Once the wicks are dry, you come to stick two parts together. Then you cut the end of the part a bit with glue (not to be too high), and put hot glue on the base, as well as in the hole along the line. Then you stick them, holding the hair while the glue cools, and so on all along the lineFourth stage
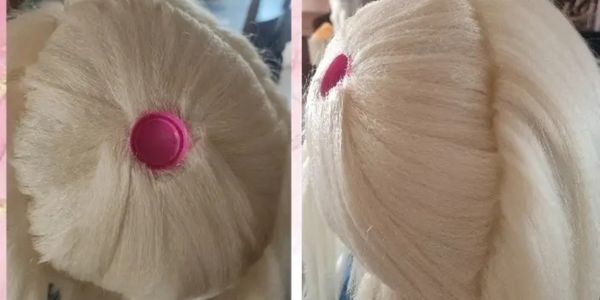
Now, you attack yourself side, front and back of the wig, since the way to do it is different. For this, you will repeat the same process as before, but instead of putting the glue at the end, you will put it much higher. So that there is a hair space without glue large enough, between the tip and the glue (as on the image). Once dry, with hot glue, you will stick the part with glue, on the contour of the wig, against wattine. So that the space left is outside the wig (against your skin). Then you cut (vertically) gradually the hair, to have a less abrupt demarcation between your skin and the wig (a hairline)Step five
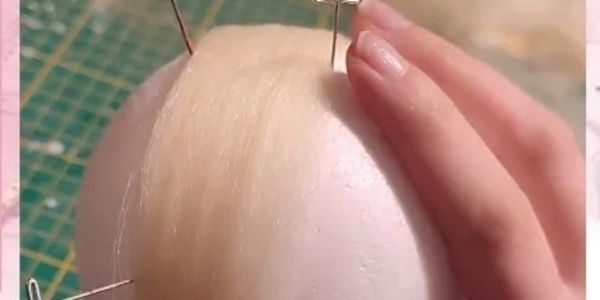
The hair glued all around, you will be able to tackle sticking hair to finally give the hair effect attached. To do this, you will have scissors, glue, lacquer (Syoss holding ultra or got2be) and a hairdryer. Let's start, first you take a small wick, that you cut to the place where the stopper will be (leave enough space to be able to stick the stopper properly). Then you put all the glue on the wattine, you then gently put the wick on it in support to stick the hair well. Then put lacquer over and heat with the hair dryer immediately after. So your wick will be glued and will not move. Repeat this process until all hair is glued. And you finish by sticking the bottle capSixth stage
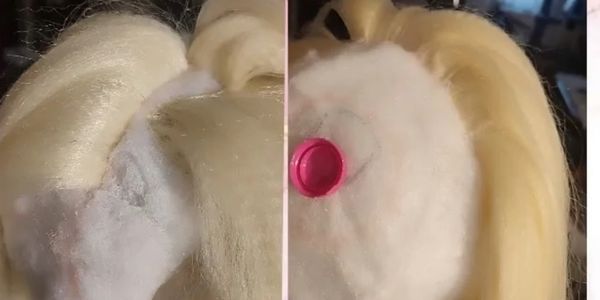
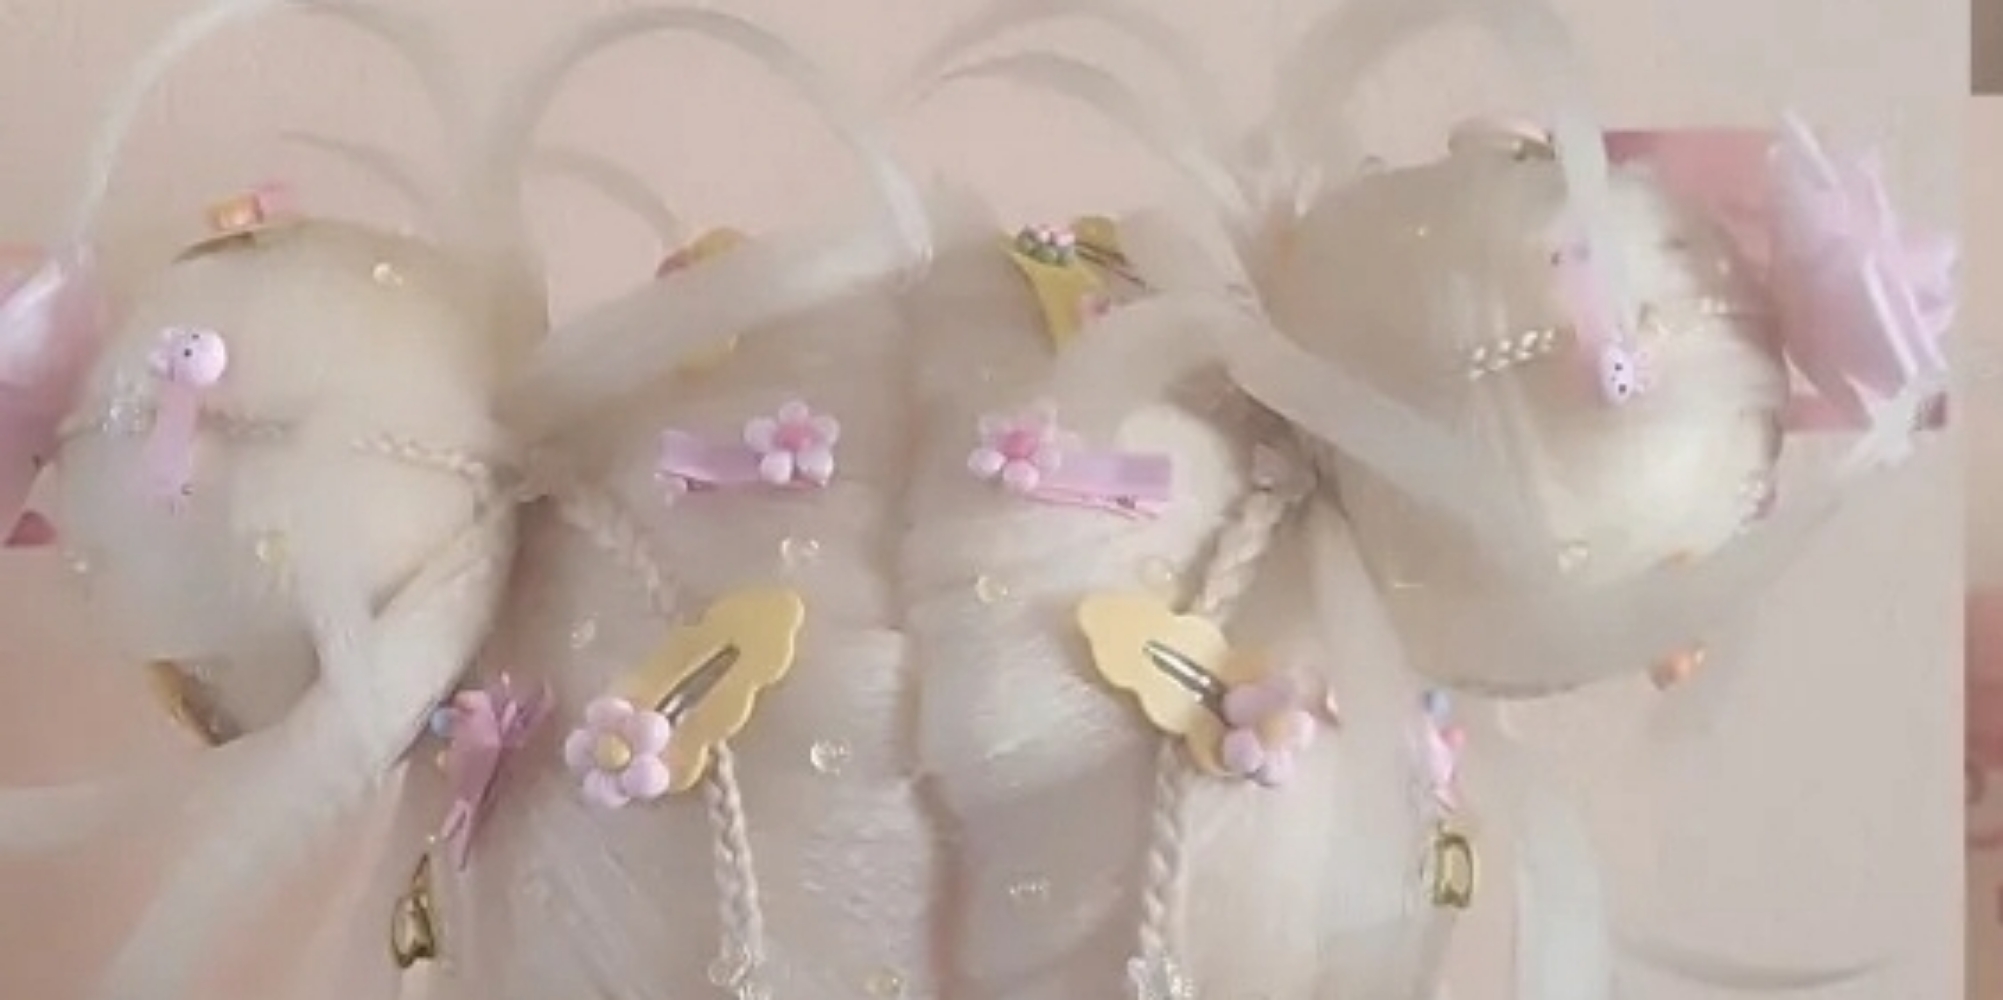
We finish by creating the chignons, for this, you will take polystyrene balls, the size varies according to the size of the chignon you want. First, you will cut the end to have a flat side (the location varies according to your preference). You will draw the contour of the bottle neck on the flat part. To cover the ball, you take a wick, put glue on the end, then stick this part on the flat side of the ball. You reproduce what you did with the wicks (paste and lacquer) on the wick of the chignon, and finish by sticking the other end on the ball on the flat side. For the placement of wicks made as you feel, according to your tastesStep 7
All the wicks stuck on the wig and on the chignons, you will cut into the polystyrene a hole, to paste the neck inside. Be careful not to make a hole too deep, to always be able to target the bunny without worries. And here you go, your wig with the hair effect tied in husks is over!