Making a wire wick
How to make a wire strand !! (For all strands of characters that defy gravity)
(The wick that I made in the photo is not necessarily perfect, but surely a few people would like to know how to take it to make one!)
What you need
- *Glue gun1
- *Iron wire1
- *Wig1
- *Scotch1
- Lake1
- Hair dryer1
- Birds1
- Waffle iron1
- Pliers for wire1
Steps
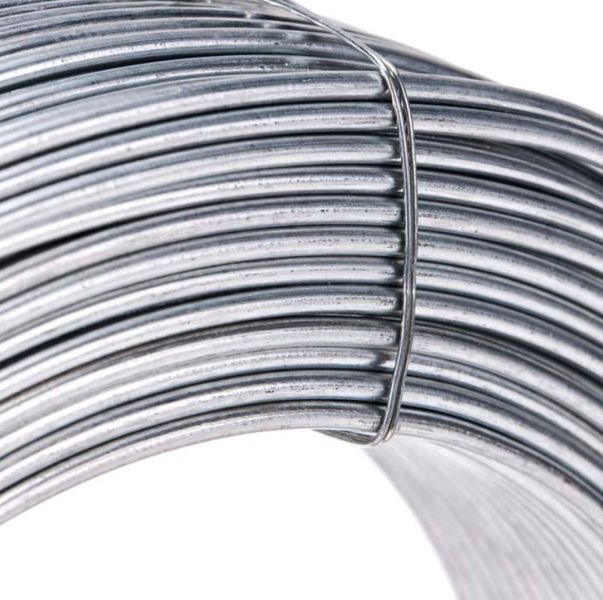
Finding the right wire
There are several types of wire, ranging from very light and thin to heavy and thick. To make the wick, a rather light and thick yarn is recommended. If you have a son to make (garden) grills I think it can work too!Cut the wire to the right length
To do this, one must take into account the length of the hair of the wig, and estimate by taking the hair of the wig and putting the wire as one would like the wick to beAttach wire to wig
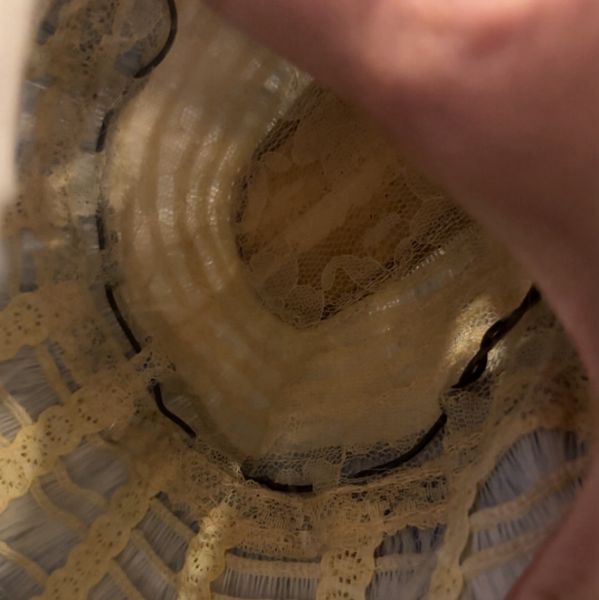
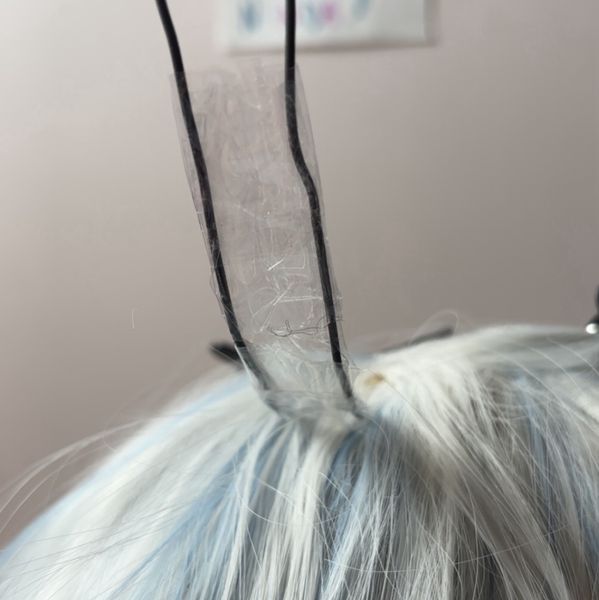
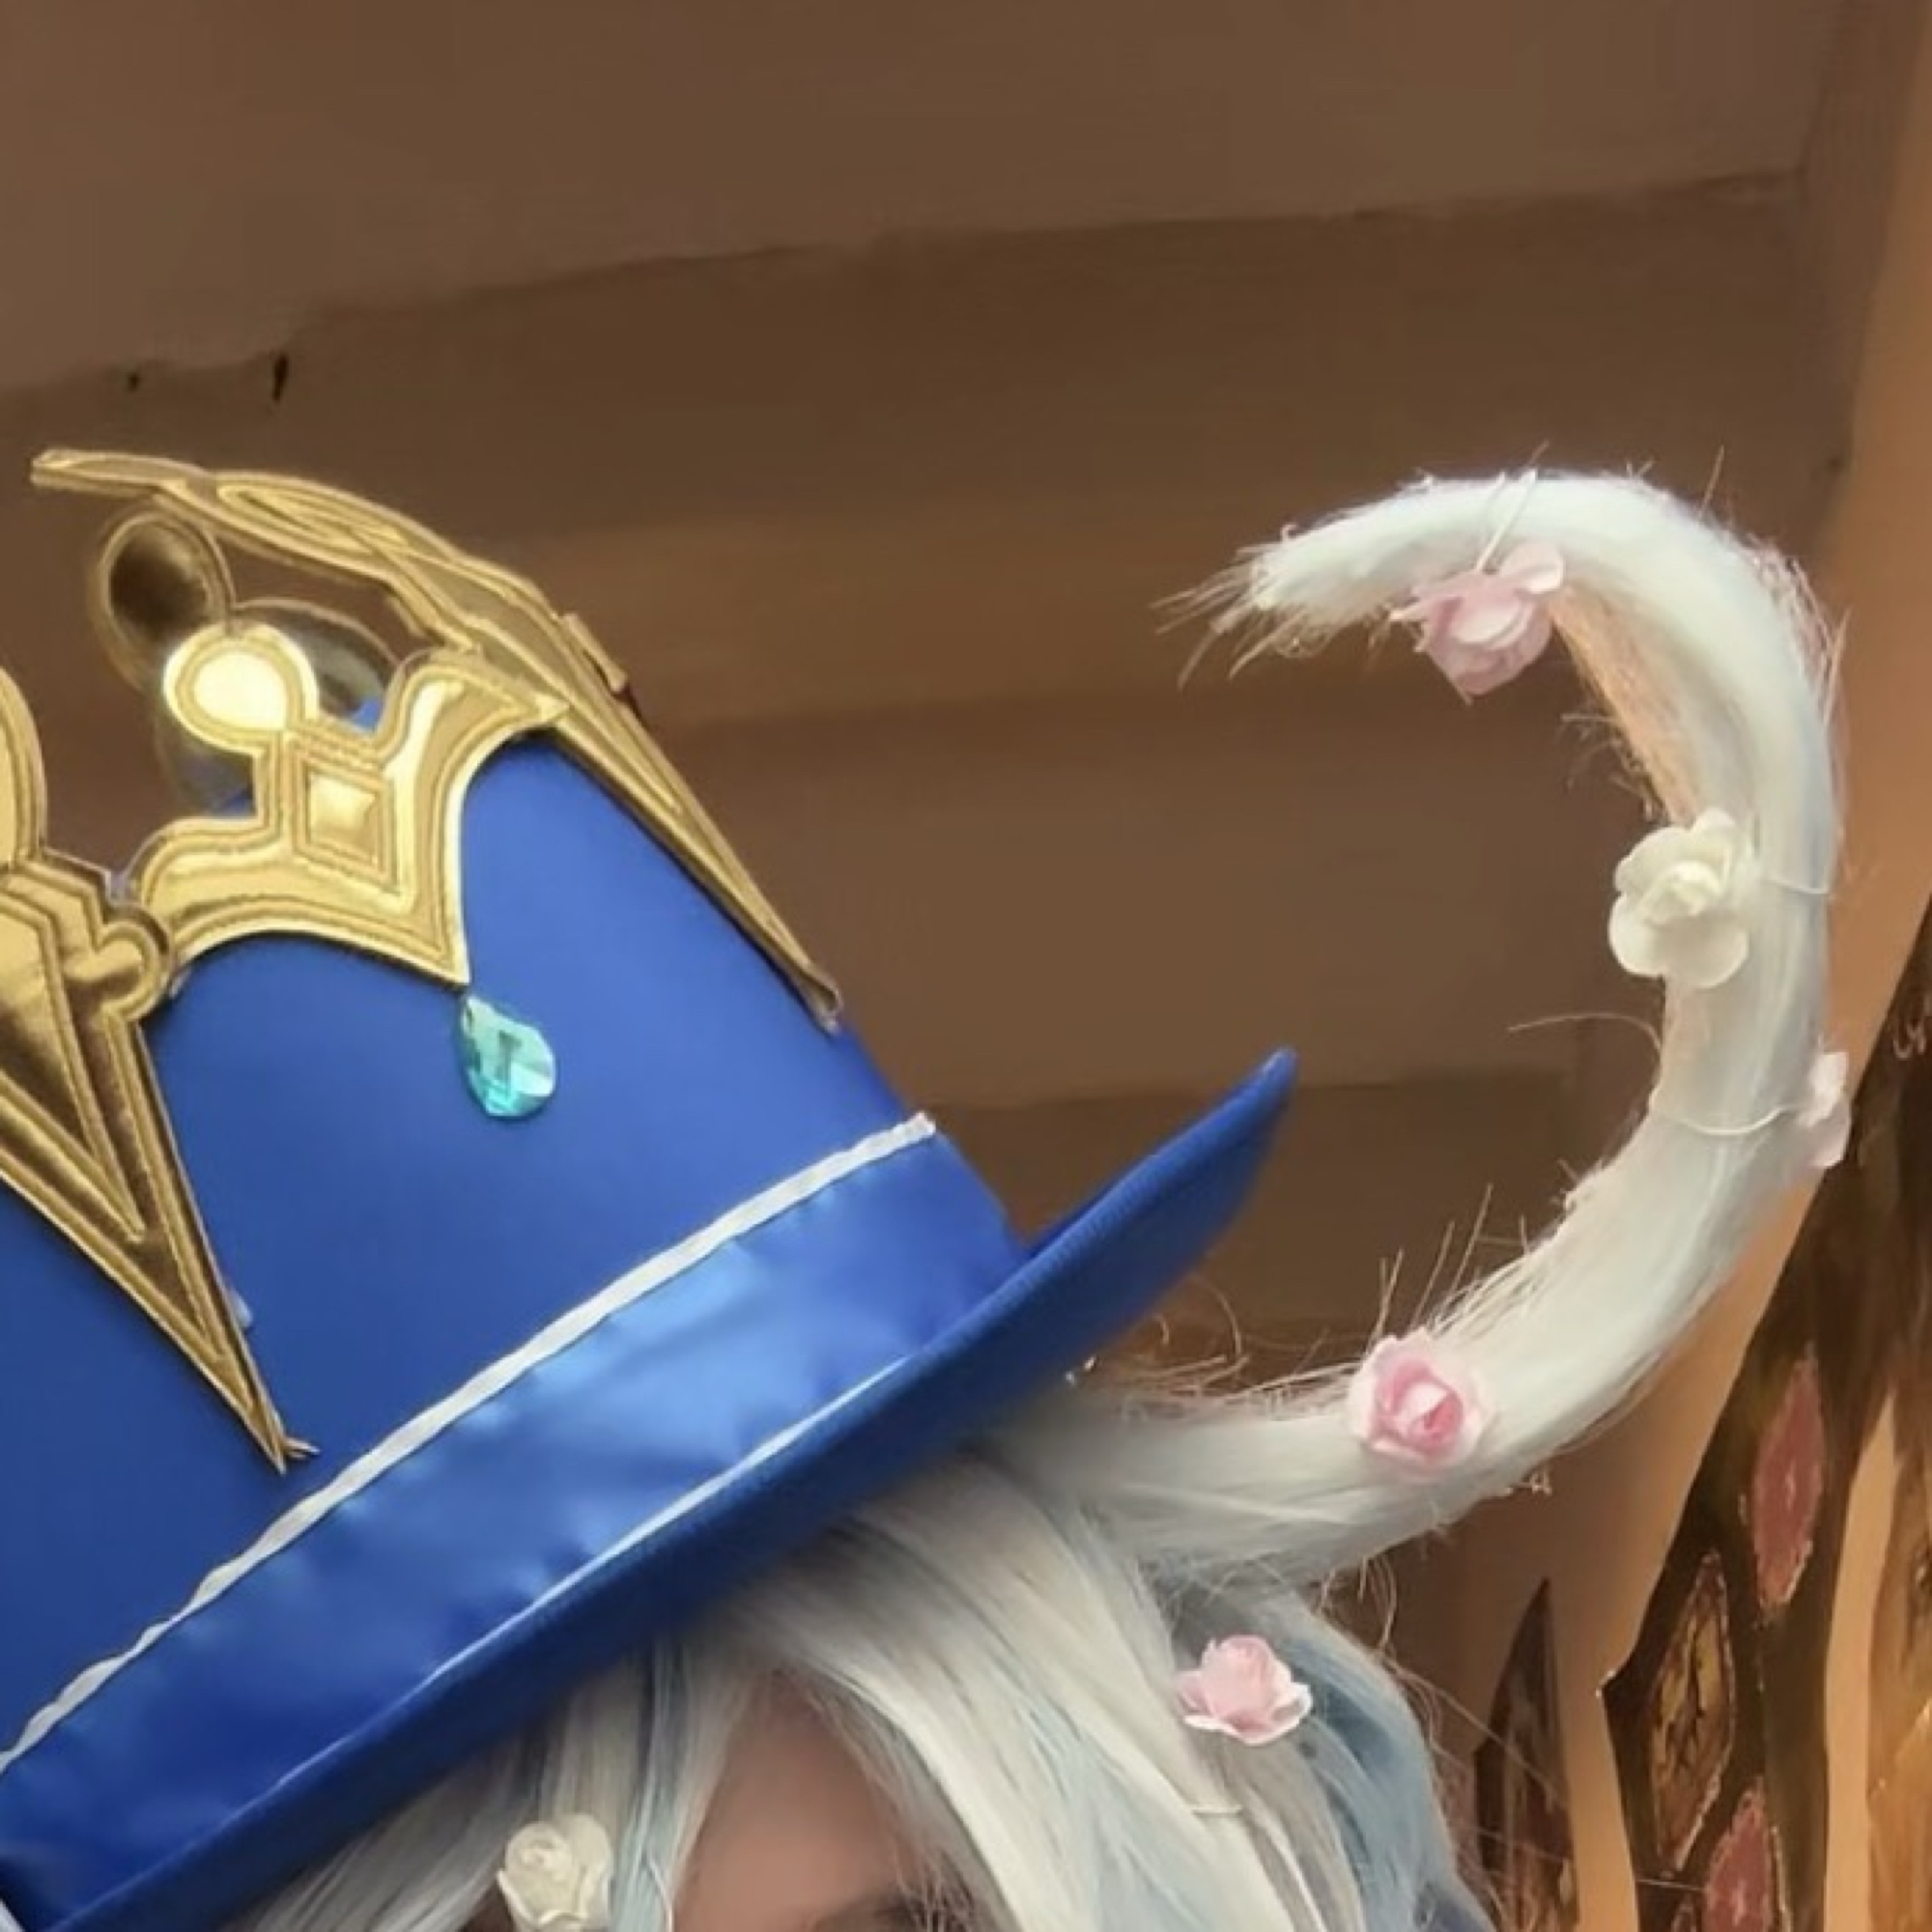
There are two ways to do this: - Attach the wire directly to the wig with hot glue; easier to achieve but the strength of the structure is less. -In this second case, it is a question of "sewing" our wire with wig: Inside the wig, at the top of the skull, it is often thicker: it is at this point that you must plant the wire (as when you sew) and make all the round, to give a form of circle! (What guarantees stability) Then the wire must be brought out outside the wig. In both cases, the wire must be flat at the base of the wig, and not fully aired Image 1: Wire inside the wig in case Number 2 Image 2: Flat wick at base of wigForm the wire
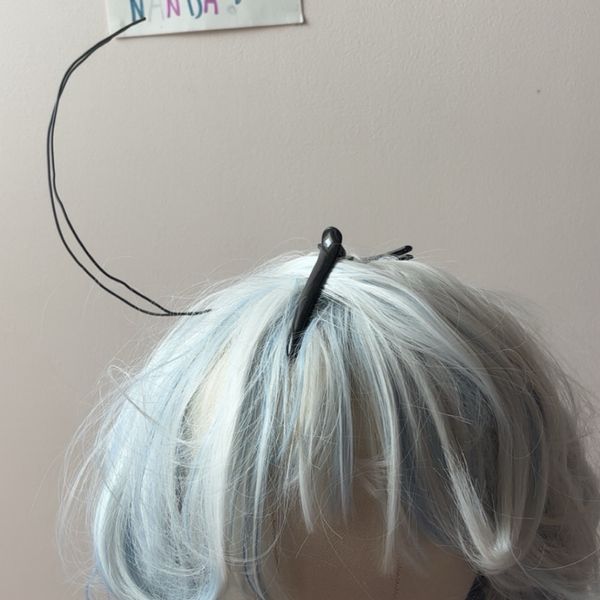
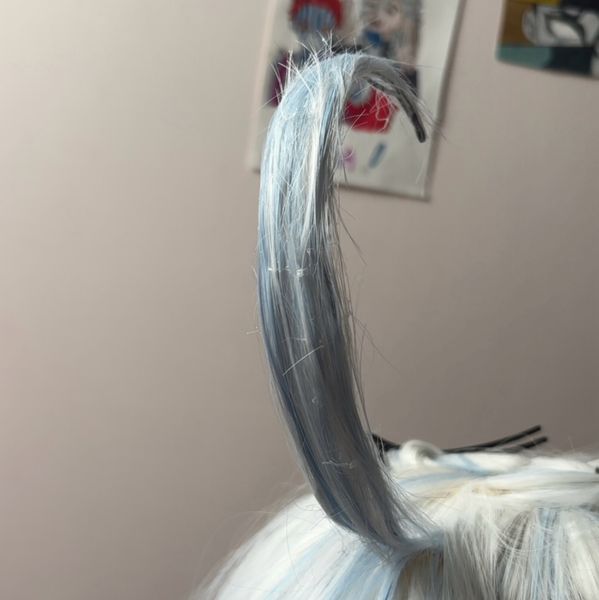
There, everything depends on the type of wire you selected. - If you have taken a rather malleable wire, you can model it as you wish! -On the contrary, if you have opted for a rigid wire, you will need a clamp to twist it!Scotch the base of the strand
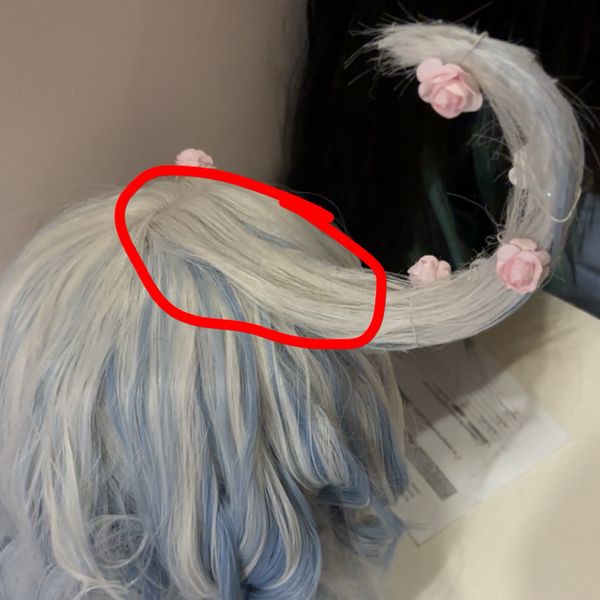
Now that the wire has the desired shape, you have to wrap it with tape! This will allow to stick the hair on the wig (it will serve as a "support" but also to stabilize the two ends of wire)Paste hair
To know: everything that follows will be easier if the hair is embossed (but it remains optional, it will just be more comfortable) Now, you will have to bring the glue gun, then take the base of the hair strand that is below or above, then stick gradually! Once the hair is placed on the structure with glue, it is necessary to stay for a few seconds with the finger that holds the wick so that it sticks well. Keep doing this until the wick ends on both sides! To avoid places where the scotch (or wire) would still be seen, you must not hesitate, before sticking, to check each placement for each small strand of hair !! Image 1: Hair glued below the structureCut the few wicks that exceed
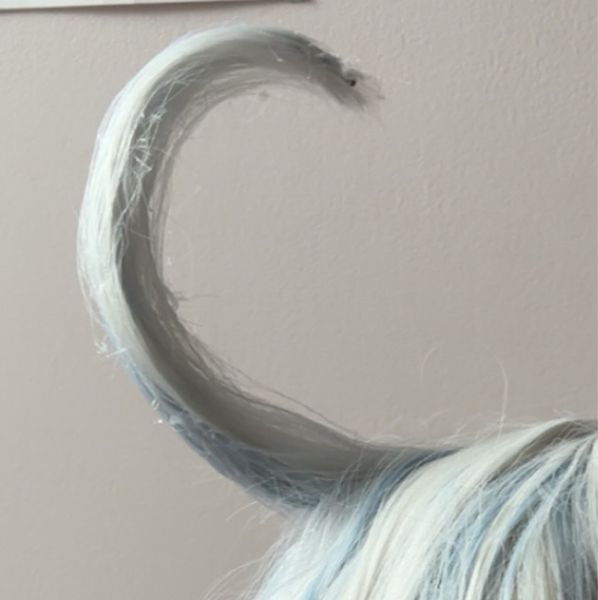
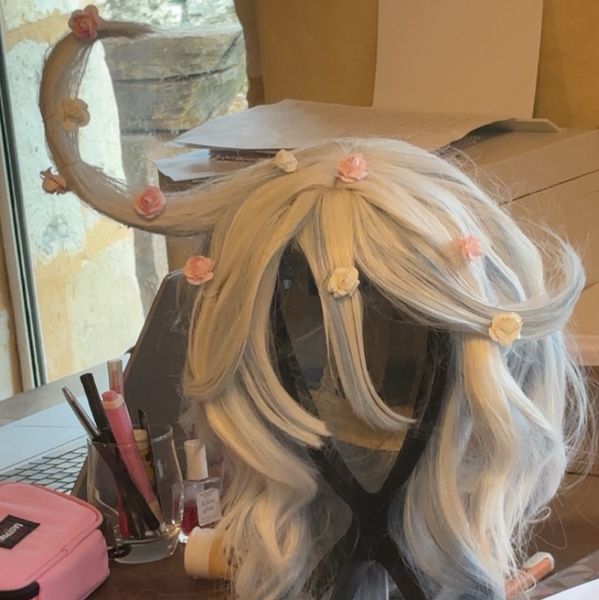
If, like me, it was your first wire wick, or if you have a can galler (BUT IF YOU HAVE MADE THE MACHINE JUST THAT YOU ARE ALREADY TROP FORT), you will have to cut the few little hairs that exceed for a cleaner rendering. Put a blow in the lake to make sure of the rendering. Here you go, you made a wired wick!! Congratulations to you!! Don't hesitate to customize it!