Patronage and foam accessories
Calculations, measurements, techniques to create your patterns of fine foam accessories.
The use of a cutter can be dangerous if it is not done with caution.
What you need
- *Fine foam1
- *Rule1
- *Wall leaves3
- *Pencil/criterium1
- *Cutter1
- *Cutting board1
- *Compat1
- Neoprene1
Steps
Sketch and sketch
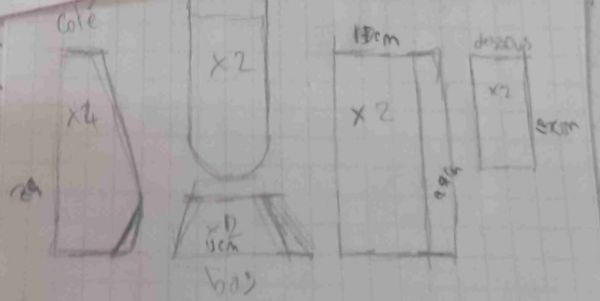
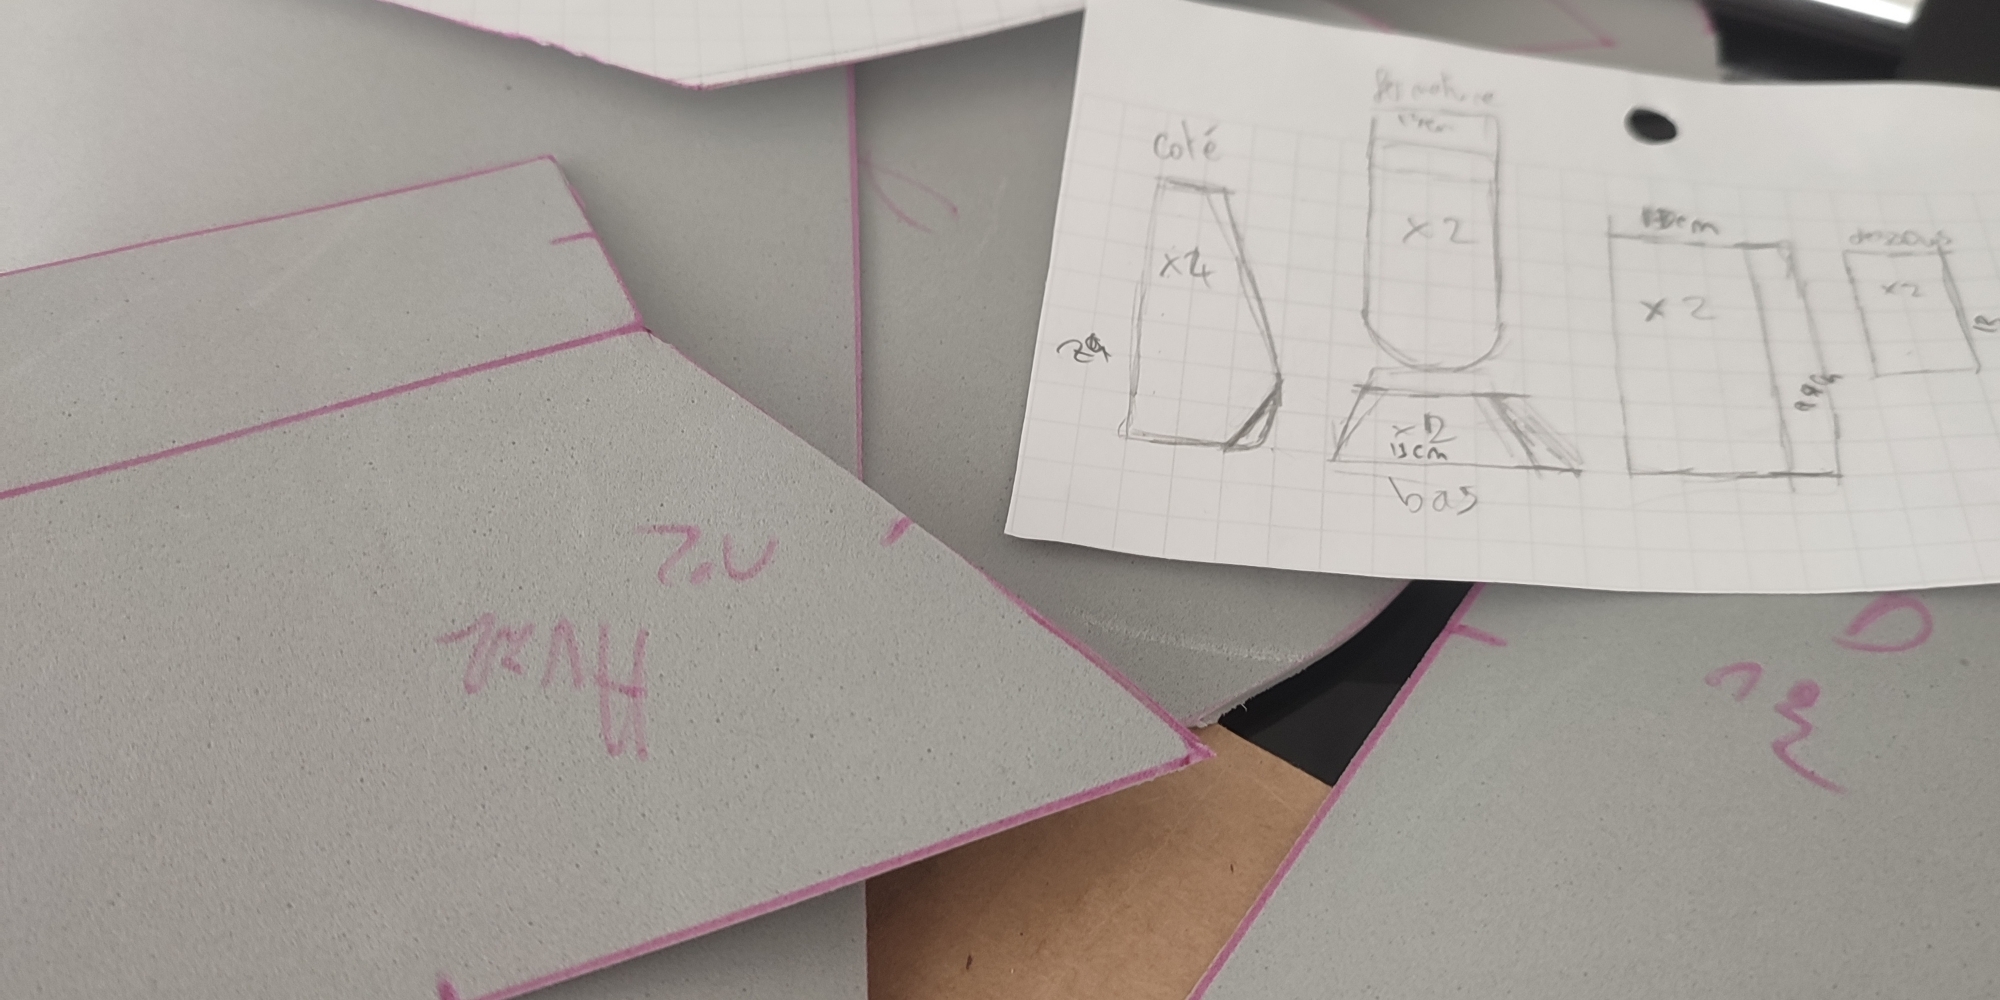
Start in the corner of a sheet (to tiles-> if possible of 0.5 like this 2 tiles= 1cm) by drawing the shapes of the contour of your accessories (side, front, back...) Try as much as possible to respect the scale to have the unit of measurement (ex: the bottom is 2c/ 7c so the part that will stick to the small side must be 2c) Example: image aboveSmall recall calculation
For the next step you need to know the cross products So little reminder: I take the form that is 2c / 7c Admit that in real size compared to you the length should be 25cm So 7 tiles = (scale for you) 25cm So to find the 2c length on the scale: 25 x 2 = 50 50 ÷ 7 = 7.142[...] Rounding to the nearest (consisting of 7) So your room will be 7cm / 25cmTraced on sheet
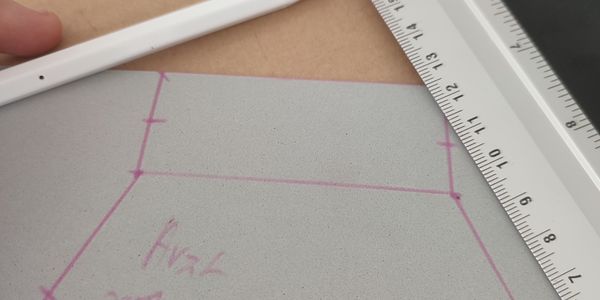
Now that you've done your measurement calculations, we're going to move on to paper. It might be frustrating. Small-scale shapes may not be pretty once on a scale in cm. So! If ever it is the small length that seems too short one can afford to add 1-2cm (large maximum 3cm!) We are thinking of adding this difference on all the pieces that will be in contact with this length! You will take your rule, criterium / pencil, compass (for rounded shapes) One begins to draw in a corner of the sheet: so if there is a need to add length, as said above, there is no problem on the sheet.Traced on foam
Well, you have your paper patterns (if you will reuse them regularly do not hesitate to plasticize!) So we're gonna trace the foam! Idem start, if possible, on a edge of your eva foam. And do not hesitate to use a rule to have the most regular tracks possible. And indicate your points of contact (the angles that will be attached to the different pieces as well as the middle of your lengths) with a small line in the pencil. It'll serve you for the rest.Cut
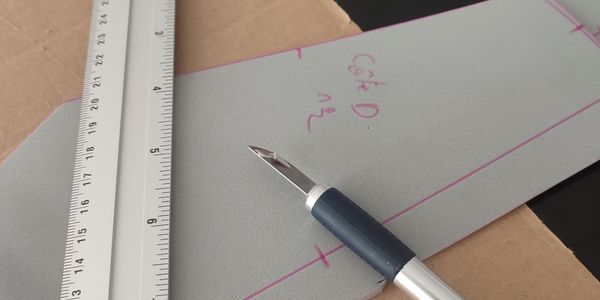
Your shapes are drawn, your contact points are marked with a small line So we'll cut! If you have a large sheet of foam, you can cut coarsely around your pieces before detailing! To do this: cutter, ruler and cutting board! And by following your tracks (without too much pressing if you have a metal rule) you will cut to the cutter (on the cutting board) Be careful with your fingersAssembly
This is supposed to be the fun part. You have your parts in cut foam, you have your points of contact. So you're going to put neoprene (glue contact) on your two corresponding lengths. PS: If there is a need to make an angle, do not stick on both slices but on a slice and edge Then you guessed it, you will stick to your contact points and then press so that the "distance" between the contact points will also fix. There you go! You have your foam accessory! (For painting, sanding... I'll let you see if there's any advice from other cosplayers)